Tuesday, July 31, 2012

Homemade Gluten-Free Granola

My in-laws are amazing cooks!  Like, they should open their own food cart, have their pictures on jars of their own sauce kind of cooks.  And lucky for us not only are they always willing to cook for us, they are also willing to share their recipes.  One of my favorite things that my mother-in-law makes is granola.  It is so hard to find decent gluten-free granola as the store-bought brands never taste quite right.  It is either too sugary or too greasy or nothing like granola. So I was really excited when I first tasted my mother-in-law's granola.  The only thing that needed to be changed from the recipe were the oats;  we had to get certified gluten-free oats, which taste exactly the same as regular oats.  (Just a side note, oats themselves do not have gluten.  They are just highly susceptible to cross-contamination. Certified gluten-free oats have not been cross-contaminated).

To start, you can make a large batch or small batch.  You can easily cut the ingredients in half.  Just be careful to not, as my mother-in-law says, "Overflow your bowl!" :)  You will need (for a large batch):

  • 4 lbs (2 large bags) of gluten-free rolled oats (My favorite brand is Bob's Redmill)
  • 1 cup canola oil
  • 1 cup honey (maple syrup and agave nectar also work)
  • 1 teaspoon salt
  • 1 tablespoon vanilla (optional)
  • 1 tablespoon almond extract (optional)
  • Any mixture of nuts that you like (I use almonds, cashews, pecans, sunflower seeds, and pumpkin seeds.  The amount and mix you use is up to your taste)
  • 1 very large bowl
  • 3-4 cookie sheets

Preheat your oven to 325 degrees. In a medium-sized saucepan, combine oil, honey, salt, vanilla, and almond extract.  The vanilla and almond extract are optional; I just like the flavor.  Heat the mixture over low heat for 5-7 minutes until it just starts bubbling.


While the honey mixture is heating, put the oats in the large bowl.  You are going to have to do some serious stirring, so if you need to split the oats in to two bowls, that's okay.  Then, stir your nut mixture in to the oats.


Once the honey mixture starts bubbling, remove it from the heat and stir so you get an even consistency of honey and oil. Then, pour the honey mixture over the oat and nuts mixture.  It is REALLY important to stir the oats and nuts as you pour the honey because you need everything to be coated with the honey and oil.  It may work better to pour a little and then stir the oats and nuts vigorously before pouring more honey.

Once all of the oats and nuts are coated with the honey mixture, spread them on a cookie sheet.  You will want to leave about 1/4 inch above the lip of the cookie sheet uncovered to keep the oats from burning.  Once you have poured all of the oats and nuts, you will have about 3-4 cookie sheets full.

Place the cookie sheets in the preheated oven.  Now, the temperature of the oven can be adjusted to meet your needs. 325 is a safe temperature but you can heat the oven to 350 if you will be in the kitchen watching to make sure the oats don't burn.  Once they start to burn, they get really black really quickly.  So, I usually like to bake them at 325.

At 325 degrees, bake the granola for 25-30 minutes.  Halfway through the cooking time, remove the granola from the oven and stir so all of the granola on the edges is moved to the middle.  This prevents burning.  Once it is done baking, it should look like this:

Let the granola completely cool before putting it in containers.  If you enclose it while it is still warm, it will get soggy.  Once it is cool, you can enjoy it as snack on its own or put it in milk to enjoy it as cereal.  This is a great power-up snack for any run or exercise!

Any favorite gluten-free snacks? Share them in the comments section!

Monday, July 30, 2012

A Crock Pot Love Affair: Gluten-Free Crock Pot Pasta

My husband has been spending so much time working on the house I have taken to calling it "the mistress".  But, in all fairness, I have a love affair of my own...with my crock pot.  Even though I complain about not having a functioning kitchen, I have secretly love getting creative with crock pot cooking.  I have tried roasts, vegetables, pastas, and even desserts in the crock pot with a fair amount of success.  There is something magical about mixing together a creative group of ingredients in the morning, turning on the crock pot, and coming home from work to a delicious dinner.

Today, I was having a serious craving for pasta.  But we were almost out of butane for our little camp store.  Even though I have not done much in the way of pasta in the crock pot, I decided to give it a go.

I decided to make a traditional pasta dish with marinara sauce and, while the results were not perfect,  we ended up with a really great dinner.  All it needs is a little tweaking for gluten-free perfection!

To start, you will need:
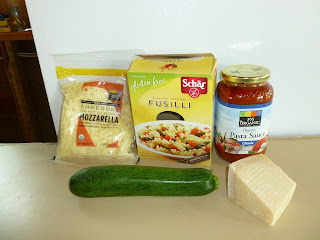
  • 1 box (12 oz) of your favorite gluten-free pasta (we like Schar Gluten-Free Fusilli)
  • 1 jar of marinara sauce
  • Your favorite vegetables, chopped (any mix from mushrooms to peppers to eggplant would work for this recipe; I chose zucchini)
  • 8 oz of mozzarella, shredded
  • About 1 1/2 cups of shredded parmesan (you can add more or less depending on your preference)
  • Crushed red peppers (optional)
  • 3 garlic cloves, minced (optional)
  • Gluten-free cooking spray (Pam Original is gluten-free, but their baking spray is not)
Soak the past in a pot of lukewarm water for about 3-5 min; then drain.  While the the pasta is soaking, reduce the pasta sauce over low-heat for about five minutes.  While it is reducing, I like to add crushed red peppers and minced garlic to give the sauce a little bite.  But this is totally optional.  Once the sauce is done, remove it from the heat. Coat your crock pot with the gluten-free cooking spray. Then, add about a half-cup of the sauce to the bottom of the pot, spreading evenly.  Once the sauce is added, add enough pasta to cover the sauce.  Then add 1/3 of your chopped vegetables and cover those with about 1/3 of your mozzarella and about 1/4 cup of the parmesan.  Continue this process until you run out of ingredients or your pot is full. Make sure you top with all of the remaining parmesan.  Add about 2 tablespoons of water to the pot.  (I added 1/2 cup and it was a little too much).  Cook on low for 3-4 hours.  (I went over 4 hours and it was too long.)


Once the pasta is completely cooked, turn off the crock pot and remove the lid.  Let it cool for about 15 minutes as the cheese gets pretty hot.  You can easily add ground beef, turkey, sausage, or chicken to this recipe.  Just cook the meat beforehand and add it to the sauce.  Either way, this is a savory, easy, gluten-free meal that the gluten-free and gluten-eaters can enjoy!

Do you have any favorite gluten-free, crock pot recipes?  Feel free to share in the comments section!

The Dreaded Treadmill....

Most runners I know hate the treadmill.  It is called boring, tedious, and some even argue that it is worse for your joints than running in the street.  I, honestly, don't mind the treadmill.  I am usually so lost in my thoughts that I don't notice where I am.  And living in the Pacific Northwest means that you either spend winter and springs months getting soaked on your runs or learn to deal with the treadmill.  Personally, I prefer the treadmill to getting soaked. But, to avoid hitting a workout plateau, it is important to vary your treadmill workouts. I found some great treadmill workouts on self.com  and fitsugar.com that work for all levels and workout interests:

If you are new to running, this is a great workout for beginners.  It is a 60 minute workout that combines walking and jogging, which they call "wogging".  This is an awesome way to introduce your body to jogging and the whole workout burns about 300 calories.  Check it out here.

For people who are looking to do a little speed-work, check out this interval workout.  You can adjust the speed to meet your needs and ability level.  If you do the workout as prescribed, you can expect to burn 500 calories.  And remember, if you burn 500 calories per day for a week, that's one pound lost!

Even though they can be painful, runners really should integrate hills in to their workouts.  If you are relegated to the treadmill, here is a great workout to keep that hill-training going.  If you can manage to do this workout a couple of times per week, you're ready for any race through San Francisco!

If you are getting "running burnout", try this treadmill workout that incorporates different types of leg workouts. You'll be feeling the burn in your legs after the sets of squats and lunges on the treadmill.

Does anyone else have any treadmill workouts that they enjoy?  Feel free to post them in the comments section!

Sunday, July 29, 2012

Surviving a Home Renovation

As you probably know if you have read any of my previous posts (or whines), my husband and I are under a massive home renovation.  When I say massive I mean walls torn down to the studs, large, unfilled cutouts to the backyard, floors that look down to the basement, taking sledgehammer to walls, using I-Phones as means of lights, cooking with a camp stove type of renovation.  Now, I admit, I am a bit of a girly-girl.  When my husband told me he wanted a fixer, I imagined more of a new paint color, sewing curtains, creating a wallpaper accent wall type of project.  And, the fact that I love to cook and bake, makes it very hard to not have a kitchen.  But, to get in to this wonderful neighborhood with the world's most fabulous neighbors, a fixer was the only option.  So I jumped on board to the home renovation with both feet.

My husband is probably one of the hardest working, handiest people I know.  And to save money and take some ownership for our house, we are doing as much of the work as we possibly can ourselves.  And, while a lot of it has been enjoyable, it can be incredibly stressful especially since this is our first year of marriage, we are both working full-time, and this is what we have to come home to:


Blue painters' tape from the front door
Our Dining Room
The entirety of our kitchen
I like to call this the "art gallery"

All sarcasm aside, I do love our house and am so excited for what it will become.  And living through this process has led me to come up with tips for surviving your own home remodel.

1)  Stay organized: Anyone who knows me will fall on the floor laughing when they see me talking about organization.  I am truly a human tornado, leaving a mess of disorganization everywhere I go.  But my wonderful husband is extremely organized and has taught me the value of organization in this process.  It is hard to keep your sanity when you are spending half of your time looking for a tool or part you need.  And it is hard to see your progress when you are living in a constant construction dust mess.  So, I am about to utter words I rarely do but should: Honey, you were right!

2) Know Your Limits: We have tried to do as much of the work as possible ourselves on the house.  And as skilled as my husband is when it comes to construction, he can not do the whole project himself and he knows that.  There are certain things that we have had to hire out either because of lack of time or lack of knowledge in that particular area.  My advice to anyone tackling a large scale construction project is to not attempt to do things alone that you really don't know how to do.  If you have no experience in electrical work, don't try and re-wire your house.  If you have no experience with plumbing, don't try and install a toilet by yourself.  Don't be afraid to ask for help and call in the experts; you'll save yourself time, money, and headaches in the end.

3)  Divide and Conquer: When your a couple doing construction, each of you are going to have your own strengths.  My knowledge of construction extends to calling tools "thingy ma jigs"  and calling screw guns "screw-removers".  But that doesn't mean I can't be of assistance in our home renovation.  While my husband is working on the house, I can pick up the slack in other areas like doing all of our laundry, working on the yard, feeding our "crew", helping with the clean-up process, running errands, and everything else that needs to get done around the house.  So, just because you don't know the difference between a hacksaw and a tile-saw doesn't mean you are not helping with the process.

4)  Set a Budget.....and Double What You Think Everything Will Cost: Let's face it, home renovation is expensive.  But you don't really know how expensive until you are in to it. There are always going to be unexpected costs that come up in the process and you will save yourself a lot of stress if you have saved money in your budget a head of time.  If you get an estimate for $3000 for new hardwood floors, save $5000 in your budget.  If someone quotes you$1500 for tile, put aside $2000.  You might not spend all of the money on what you saved it for, but you will most likely spend it somewhere on something you didn't anticipate like on a leaky basement or a broken water heater.  And if you come out ahead of budget, you will have extra money to take a much needed vacation to Hawaii. :)

5)  Know What Needs to Be Done Now, and What You Can Save for Later:  When our main floor is done and we are ready to show it off to friends and family, I would love to have all brand-new stainless steel appliances in the kitchen and a new wine bar in our dining room.  But, as mentioned above, we don't have room in the budget for everything that we want to do.  When making sacrifices, we had to decide what would be the easiest to save for later once everything else is all done.  And while I would love a new stainless steel refrigerator, that is much easier to save for later then trying to put in new windows or a new door to the backyard.  As hard as it is to compromise on your vision,  take a step back and compromise on things that can be done later.

6)  Rally the Troops:  When you start a home renovation, the amount of work that needs to be done can seem daunting.  To help ease the stress of the workload, call your friends and family in to action.  Order a few, gluten-free pizzas, get some gluten-free beer, and invite people over for painting parties or an evening of wallpaper removal.  Having a group of people not only helps the process go faster but it also makes it fun!  And most people there will find they have a good-time, too.  But remember....

7)  Remember Other People Have Things They Would Rather Do Than Your Home Improvement: While an occasional painting or sanding party can be fun, most people don't want to spend their entire weekend on your home renovation.  Just ask when you truly can not get something done without the help of others so people don't feel taken advantage of.  Unless, they're your parents.  Then you can ask every weekend. Right, Mom and Dad?

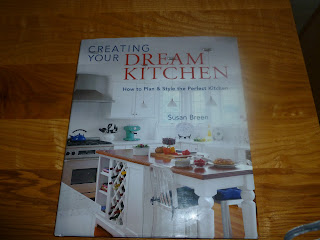
8) Keep Your Eyes on the Prize:  When you are living through a home renovation, it is hard to see the progress you make. A day of back-breaking work putting up a support beam that no one can see may seem underwhelming. Make sure that you keep the end vision of what your project will be in mind to keep your motivation and spirits up.  Read home improvement magazines, design books, and whatever reminds you of what your house will eventually look like.


9) Keep a Sense of Humor: Home renovation sends stress levels up and can cause you to lose perspective.  While it may be hard to see in the moment, yes, it is funny when you step in a can of paint.  It is funny when you trip over power cords (as long as you're not hurt).  If you can laugh through the difficult moments of home renovations, you will most definitely look back on the process with fond memories.

10) Last But Not Least, TAKE BREAKS!  When it comes to home improvement, I am an excellent break-taker, even an exceptional break-taker.  You might say that I am the master of all break-takers! And while some may call that laziness, I call it realism.  You will never survive through an extensive home renovation unless you have the ability to step away from it and enjoy other parts of your life.  When frustration takes over, go on a run or walk.  Take an evening and go out to dinner or a movie.  Even take the weekend and go to the coast for some R&R.  Taking breaks is truly the key to staying sane and having a truly enjoyable home renovation.

And, when all else fails, retreat to the upstairs, eat some chips, watch the Olympics, and post to your blog. ;)

Saturday, July 28, 2012

Gluten-Free Cinnamon Honey Pancakes

Saturdays are usually my long-run days, otherwise known as my excuse to eat pancakes day.  Pancakes are more than just a delicious breakfast food.  They represent family togetherness and the traditions of weekend mornings.  They remind me of my dad making weekend breakfast for us and my mom telling him to turn down the stove so we would not have burnt globs of batter. In my post-gluten world, I am determined to keep the tradition of Saturday mornings, family, and pancakes going.

I came across a recipe for pancakes on the food.com that sounded intriguing.  Instead of using refined sugar, the recipe called for honey, vanilla, and cinnamon.  As I get older, I realize how important it is to limit my refined sugar intake and no longer have the diet of a gluten-free truck driver.  So, in my quest to bring the gluten and gluten-free worlds together, I decided to try and make these gluten-free.  With the stamp of approval from my husband, here is the gluten-free recipe for these pancakes.

You will need:

2 1/4 cups of all-purpose gluten-free flour (click on link or view previous post for the recipe)
1 1/2 teaspoons of xanthan gum
3-4 tablespoons of cinnamon
1 teaspoon  baking powder (check that it's gluten-free)
1/4 teaspoon sea salt
1 3/4 to 2 cups milk (cow, soy, almond milks will all work)
2 eggs
2/3 cups  honey
1 tablespoon vanilla
1/4 cup of oil (vegetable or coconut)
(Note: This recipe can be cut in half if you do not need this many pancakes.  Use 1/2 cup of honey and 1 teaspoon of vanilla and cut the rest of the ingredients in half)


In a bowl, whisk together the flour, xanthan gum, cinnamon, baking powder and salt. Some gluten-free flour mix recipes will have you add the xanthan gum in to the mix, but I am pretty particular about how much xanthan gum goes in to each recipe as it is a powerful leavening agent and. it's expensive.  How much cinnamon you add depends on how much you like cinnamon.  You need at least 3 tablespoons, but I really love cinnamon so I add 4.  Keep whisking all of the ingredients until they are completely mixed.

Once all of your dry ingredients are mixed, add in the milk.  If you like a thicker pancake, 1 3/4 cups is fine.  If you like a thinner, crispier pancake, you should add two cups.  Then add the eggs, honey, vanilla, and oil.  The honey makes the batter sticky, so make sure everything is mixed well.

Once the batter is mixed, add ladle the batter on to a greased pan and cook over very low heat.  If the stove gets too hot, they will burn quickly.  Trust me.  Cook one side for about 4-5 minutes or until you see the batter start to bubble.  Then, flip the pancake over and cook for another 4 minutes.  This recipe makes about 12 medium-sized pancakes.

Once your pancakes are done, you can serve them with your favorite topping.  Blueberry syrup goes really well with them as does honey.  But I am a traditionalist at heart and I eat them with good ol' maple syrup.

Hopefully you enjoy this recipe!  But, an important note, if you are planning a long run after eating these, limit yourself to 3.  Trust me.

Any favorite gluten-free breakfast recipes?  Feel free to share them in the comments section!

Gluten-Free Flour Mix

(My attempt to show off my gluten-free flour while hiding my kitchen that is torn down to the studs)

Going gluten-free was not going to prevent me from partaking in the joy of baking.  I have always loved baking, from the time I was little waiting for Christmas cookies to cool or helping my mom make chocolate-chip cookies and getting to lick the spoon, before we learned about Salmonella.  I knew I wanted to continue baking and enjoying all of the treats that I grew up with.  But, I had to first get over one big hurdle: finding the right flour.

As I quickly learned, it was not going to be as easy as substituting a gluten-free flour for the wheat-flour.  Rice flour does not work for baking on its own and the premixed gluten-free all-purpose flours never tasted quite right to my finicky taste buds.  Undeterred, I knew I could find the right combination.

After some extensive reading from various gluten-free cookbooks and blogs, I learned that creating a gluten-free flour requires a delicate mix of ingredients.   I also learned that different mixes are needed for different types of baking. For instance, you will use a different mix of flours for cookies, than you will for cakes and brownies, and those will look different from pastry mixes.  But, with a little time, you can create flours to bake all of the treats just as well, or even better, than those you remember before you went gluten free.

Most people divide gluten-free flour in to three different categories: heavy, medium, and light.  Heavy flours include your grain and grain-like flours like buckwheat, millet, quinoa, corn, nut, and bean flours.  These flours make your produce heavier and denser.

Medium flours are your most common type of flours.  Examples of these types of flours are brown rice flour or sorghum flour.  These will usually make up a large part of your flour mix.

Light flours are most commonly gluten-free starches, like tapioca starch (also known as tapioca flour), potato starch (NOT the same as potato flour), and corn starch.  Make sure they are labeled gluten-free because some brands of these starches contain gluten.

If you are looking for more in-depth information about gluten-free flours, visit the gluten free goddess or the gluten free mommy. They have great information about all types of gluten-free flour; these women are AMAZING!

For my basic gluten-free, all-purpose flour mix that I use for cookies, pancakes, waffles, and roux, I follow a basic 2:2:1 rule.  2 parts light flour or starch, 2 parts medium flour, and 1 part heavy grain flour.  I have personally not tried all possible combinations but I have tried quite a few and the consistency of the baked product was similar for each.  The flours that you choose depend on the taste you like and your tolerance of other grains.

My go to mix is 2 parts tapioca starch, 2 parts brown rice flour, and 1 part almond flour.  Some people like to substitute a bean flour or quinoa flour for the almond flour because of the health benefits.  But I have trouble tolerating quinoa and bean flours so I stick to almond flour.  Other people like sorghum flour over brown rice flour for taste purposes.  But I really don't notice the difference and brown rice is easier to find.  So which ever you prefer works fine.

This is only my basic flour mix.  When I bake cakes, pies, pastries, or breads I use other flour mixes.  And I'll share those when I have a stove to bake with....hubby.....when's that happening??? Just teasing.:)

What about you?  Any flour mixes that anyone else likes to use?

Friday, July 27, 2012

A Little Bit of Inspiration....

I admit it, I am a huge Olympics groupie! I watch as many events as I possibly can from the swimming, track and field (my favorite), diving, gymnastics, water polo, and even the synchronized swimming (I honestly think it is really cool to watch).  It's not just the sporting events that pull me in; I love the opening and closing ceremonies, the medal ceremonies (I often cry), and especially the behind the scenes stories of the athletes.  So it comes as no surprise that I was extremely touched by the story of one of the cyclists.  When I was checking on the latest news in the alopecia world, I came across the story of Joanna Roswell,  a member of Britain's Olympic cycling team and a favorite to win gold.  She also has alopecia and has been losing hair since the age of 10.  At the age of only 23, she was able to get up in front of the world and accept medals with her teammates with no wig on.

This story inspired me for many reasons.  I was only a couple of years younger when all of my hair fell out and there were times I had a hard time leaving the house with my wig on, let alone stand in front of the whole world with no wig.  I would be in constant fear of whether or not people could tell I was wearing wig, if people would ask me about it, or, worse, if they would comment behind my back about it.  In many ways, I gave my early 20's to alopecia. I lost my confidence and a lot of my self-worth.

So, when I read Joanna's story, I was immediately inspired. She was the type of woman I wished I could have been and the inspiration to others I wanted to be but never had the strength.  She did more than just not wear her wig; she reminded all people dealing with hair loss that there is so much more to us than just a head of hair and there is life beyond our alopecia.  And I can say pretty confidently that her alopecia was not defining her up on that podium.  So I would like take the opportunity to say to Joanna and all of the other women out there who are brave enough to go wig-less, you go girls!  I will try and remember to wear my bald spots with a little more pride. :)

If you want to read more about Joanna, click here.

Thursday, July 26, 2012

Training for a Half-Marathon

Once I went gluten-free and started feeling healthy again, I started back up with one of my favorite pastimes: running.  For the past 5 years, I have worked hard to get back in to distance running shape.  I ran two marathons and several half-marathons, one of my favorites being the Fueled by Fine Wine Half-Marathon.
Here is a picture from the 2011 race


The race is hard but gorgeous going through the Oregon wine country.  The views are spectacular from the course, almost to make all of the hills worth it.  :)  And to top it all off, your entry fee includes a wine tasting event once you are finished hosted by all of the local vineyards.  What could be better after running 13.1 miles!?  I was all geared up to run this year, too, but I came down with the worst case of stomach flu I ever had.  Saturday night before the race, I was clutching Gatorade in bed barely able to move.  Suffice it to say, I was not going to make it to the race in the morning. :(

Now, feeling better and a month of summer vacation left, I am feeling the need to fit in another half-marathon.  I hate to let all of that training go to waste.  I am thinking of signing up for the Eugene Women's Half Marathon in Eugene, OR.  I ran the Nike Women's Marathon last October during our "mini-moon"; don't I have the best husband?!  I loved the girl-power spirit of that run and I think it will be fun to run another race dedicated to women. And to run in the city of Prefontaine and the Ducks, what could be better!

The race is only a month away and, even though I did a lot of training for the Fueled by Fine Wine Half, I need to keep the training going so I am conditioned for race-day.  I researched different training schedules for half-marathons and I came by some great programs and advice. 

Fitsugar.com has a great beginners' program that you can access here.  This is a great schedule to follow if you are new to half-marathons, coming back from an injury, or just want to run for fun.  Make sure you can run the shorter distances before committing to the program.

Hal Higdon also has great training programs on his site.  What I like about his training programs are that he has something for everyone from the first time half-marathoner, to someone who wants to improve his/her time, to the seasoned/elite half-marathoner.

Nike also has great training programs specific to the Nike Women's Marathon/Half-Marathon.  The best thing I like about their training program is that they include a strength-training program specific to distance runners and injury prevention.  Click here if you want to check it out.

If any of these programs interest you and you are in the Pacific Northwest, come join me at the Eugene Women's Half!  It may not have a wine tasting at the end, but they have chocolates, champagne, and free massages!  


Daily Mile Run Tracker

I just discovered a great way to track workouts on the blog Jill Will Run called Daily Mile.  You can track how many miles you ran, how fast you ran, and your felt on your run.  The site will also tell you how many calories you have burned, how many cheeseburgers and donuts you've burned, and how much gas you save by running versus driving.  You can link up with other runners to encourage each other, send motivation, or to learn about upcoming races. Only two runs tracked and I am already having a blast with it.  If you want to get back in to running or need some motivation for training, check out the site on my home page.  Happy running!


Last Run

3 mi
00:28 /09:20 pace
3 mile run after an hour long lifting class! Good, easy run on the treadmill :) posted 1 hour ago
Week Miles
mi
2012 Miles
mi
Total Miles
mi


Wednesday, July 25, 2012

Creating a "Hybrid" Kitchen


As I mentioned in my last post, we are currently in the middle of a massive kitchen remodel on our new house.  When my husband, Paul, read my post about creating a completely gluten-free kitchen, his face sank.  He has been so supportive of my need for a gluten-free lifestyle and embraced almost all gluten-free products from pasta, to cereal, to my gluten-free baking.  But the one thing he has not come around to yet is gluten-free sandwich bread.  And I can't say that I blame him.  So far, I have not been able to find a gluten-free sandwich bread that stays moist enough to really be enjoyable for any period of time. So, when he looked at me and sweetly asked, "Does that mean you're not going make me grilled cheese anymore",  I knew I had to re-imagine my kitchen to be a "hybrid kitchen."

After doing research, here are some tips on how to create a kitchen that serves both the gluten-eating and non-gluten-eating alike.  I have to thank the people at fooducopia.com for offering some great tips on creating a celiac-safe kitchen!

Tip #1:  Clearly label all foods in your kitchen to indicate whether or not the food contains any gluten. It's probably easiest to label gluten-free foods "GF."

Tip #2:   Make a cupboard or two of all utensils that are used for cooking things containing gluten.  For instance, have separate frying pans, pasta pots, measuring cups, mixing spoons, toaster, strainer, blender, and even crockpot.  I know that this may seem like overkill, but sharing these items puts you at serious risk for being contaminated.  Make sure you have two of any of these items and you know which ones have touched gluten and which ones are safe.

Tip #3:  You also need to have a cutting board that is designated for products containing gluten.  When I make my hubby my famous grilled cheese ;),  I need to make sure that none of my food comes in contact with that surface.

Tip #4:  Make sure to have two of all spreadable products, like butter, jam, peanut butter, that will come in contact with food containing gluten.  It is probably a good idea to label those products "GF" as well.

I hope these tips help!  If you have any other advice, feel free to leave a comment in the comments section.  Now, I think it's time for me to make a grilled cheese....

Tuesday, July 24, 2012

Gluten-Free Peanut-Coconut Crunches


Even though you're never supposed to open with an apology, I have to apologize for the poor photography.  Our house is under complete remodel and I have no prep space to display anything.  So this is where all of the magic is happening:
  Despite only having a camp stove as a means of cooking anything, after a really bad week I was in desperate need of a homemade cookie.  So I decided to get creative with the no-bake variety of cookie. To make these delicious and completely gluten free cookies, this is what you need:

  • 1/2 cup of salted butter (unsalted should be fine, too, but some unsalted varieties have a gluten additive so be cautious)
  • 1 cup of sugar
  • 1 cup of dry roasted peanuts (again, make sure they are gluten-free)
  • 1 egg, beaten
  • 1 tsp. of gluten-free vanilla
  • 2 cups of Rice Krispies (make sure they are in the tan box that says "gluten-free."  I had to learn the other ones were not gluten-free the hard way)
  • 1/2 cup of coconut
  • 1 1/2 cups of chocolate chips (optional)


First, you need to melt the butter in a sauce pan or skillet over low heat.


Once the butter is completely melted, take it off the heat.  Add the sugar and the peanuts, mixing them well.  Return the sauce pan to the heat and cook the mixture for about 3-4 minutes over low heat.
Leaving the mixture on the heat, add the beaten egg.  You need to keep stirring vigorously as you add the egg or it will not combine with the butter-mixture.  Think that the faster you stir, the more cookies you can eat when you are done. :)
Once the egg is mixed in,  add the Rice Krispies, coconut, and vanilla and remove from the heat.  Immediately, take spoonfuls of the Rice Krispie mixture and roll it in to balls.  It may feel a little crumbly at first but they will firm up.  Spread the formed cookies out on a plate or baking sheet so they are not touching each other a refrigerate for about 30-45 minutes.
While the cookies are cooling, if your heart desires, melt the chocolate chips to coat the cookies.  You can melt them in the microwave or the stove but I prefer to melt them by placing a ceramic, heat safe bowl over boiling water and stirring the chocolate in the ceramic bowl until they are just melted.  The chocolate does not burn as easily this way.


Once the chocolate is melted and the cookies have cooled, you can coat the cookies with the chocolate for an extra-decadent treat.  


If these are a little too rich for you, they are also delicious without the chocolate.  Either way, this is a totally crowd-pleasing, gluten-free treat that can be made in even the most torn-apart kitchens.

Monday, July 23, 2012

Welcome!

Life without gluten but a full head of hair!


Hi!  Welcome to the Gluten-Free Lifestyle!  I have been living gluten-free for the past 7 years since being diagnosed with Alopecia, an autoimmune condition that causes hair loss, and Celiac Disease.    Determined to not let my diagnosis of celiac disease interfere with my love of cooking and baking, I have created a collection of gluten-free recipes loved by non-gluten eaters and gluten eaters equally.  I hope this site will help people new to the gluten-free world realize that they do not have to give up good tasting food.

What You Will Find Here

These are the posts that you can expect to find on my site:

Gluten Free Recipes:  I will post gluten-free recipes that I have created and that I find that pass the taste of my toughest critic, my husband. :)

Celiac News: Any information, news, or resources that I find about celiac disease or gluten intolerance that I come across

Alopecia Support: Posted on the site will be an current new or support resources for people with alopecia, as well as a hair tricks and tips to cover up those troublesome bald spots.

Fitness:  Once I started eating gluten-free, I had the energy to start running again, one of my favorite pastimes!  I'll post information about my favorite places to run, upcoming races, and training tips for 5ks, 10Ks, half-marathons, and. gulp, marathons. :)

Home Improvement: After our wedding, my husband and I wanted to start our lives together in a new house and a gluten-free kitchen.  We didn't realize, however, that we would have to build it from scratch.  I'll share our journey of renovating our 1920's fixer to have a new layout and a gluten-free kitchen!

How to Contact Me


If you would like to get in touch with me, you can follow me on Twitter or Pinterest or like me on Facebook.  You can also email me at mollykangas1@gmail.com.