Monday, December 31, 2012

Gluten-Free, Vegan Pumpkin Pie

This holiday season, I was tasked with a new baking challenge: make pumpkin pie that is not only gluten-free and vegan!  I fit right in with my husband's family as many of them also have dietary restrictions, including his aunt and uncle who are both gluten free and vegan.  One night when we were all out to dinner, we were talking about who was the best pie-maker.  And me, feeling the need to boast, told everyone I could make a pie that was gluten-free and vegan and would be as good as all of the other pies.  And when my challenge was accepted, I realized I actually had to figure out how to do that.

I got the idea from the blog Sarah Bakes Gluten Free and adapted in slightly to fit what I had in the pantry and my own taste.  To start, you need to make the dough for the crust.  This can be the most challenging part because you'll have to do a lot of "substitution"here:

Ingredients for the Crust:

  • 3/4 cup almond meal
  • 1/4 potato starch
  • 1/4 millet flour
  • 3 tablespoons of ground, gluten free oats
  • 1/3 cup vegan, organic shortening (I used Spectrum, Organic Shortening)
  • 1 teaspoon salt
  • 1 tablespoon maple syrup or honey
  • 1 tablespoon water


Combine together the almond meal, oats, potato starch, millet flour, and salt.


Using a fork or the flat beater on a stand mixer, cut in the shortening to the flour mix.  It should resemble a sand like substance before it starts coming together in a dough.  Then, add in the maple syrup or honey and blend until it is completely combined.  Then, add in water until the dough is moist and comes together in a ball.  (You can use more water if needed).

Place the dough on a piece of parchment paper large enough to roll out the dough 11" in circumference.  Place an equal sized piece of parchment on top of the dough and roll the dough out in to, approximately, and 11" circle.  Grease a 9" pie pan with shortening or gluten free cooking spray.  Remove the top layer of the parchment paper a place pie pan upside down on the dough.  Flip the pie pan over with the dough and parchment paper.  Press the dough down in to the pie pan so it is flat on the bottom.  Remove the parchment paper from the dough.  Pinch the excess around the outside of the pan so it resembles a regular pie crust.  Refrigerate for one hour.

Ingredients for the pie filling:

  • 1 large can of pumpkin puree
  • 1/3 cup potato starch
  • 1 cup coconut milk
  • 2/3 cup maple syrup or honey
  • 1 tablespoon vanilla
  • 1 teaspoon ginger
  • 1 Tablespoon cinnamon 
  • 1/2 teaspoon nutmeg
Preheat the oven to 350 degrees.  Combine the pumpkin, milk, vanilla, and syrup/honey.  Whisk in the potato starch and spices until well-combined and smooth.  Remove the pie crust from the refrigerator and pour the pumpkin mix in to the cold crust. 

 Bake for around 50 minutes or until the center is no longer jiggly.  Refrigerate overnight and serve with your favorite topping!

Any favorite recipes that cater to several food intolerances?  Share in the comments sections!  And have a wonderful New Year everyone!


Thursday, December 27, 2012

Gluten Free Baked Penne with Gluten Free Meatballs

I am a diehard pasta lover!  There is nothing better than coming in from a long run in the cold to a plate of warm pasta.  Even though there is no genealogical evidence, I am convinced I must have some Italian heritage in me.  One of my favorite dishes to make is baked penne with meatballs.  It has the enjoyment of a lasagna with half of the work.  My husband, who does not have the same love of pasta as I do, loves when I make this dish.  The smell of meatballs and sauce permeates the air to where you can even smell it outside.  To ease the letdown of the post-holiday season, I made this dish with, what I think, great success:

Ingredients for the Meatballs:
2/3 lb Italian Sausage (Turkey sausage works, too, and I will probably start using turkey sausage after the new year when I am willing to admit my pants are hurting me)
1/3 lb ground pork (ground turkey works, too.  Same disclaimer as above)
2/3 cup gluten free bread crumbs (cornmeal works, too)
2 eggs, beaten
1 garlic clove, minced
1/2 teaspoon salt
1 teaspoon black pepper
1/4 cup parmesan cheese

Preheat the oven to 400 degrees.  Add the bread crumbs to a bowl and add just a touch of water to make them just moist, but not wet.  In another bowl, mix together the sausage, pork, eggs, salt, pepper, garlic, and parmesan.  Then, stir in the bread crumbs.  Continue mixing ingredients with your hands until they are just combined.  Shape the mixture in to meatballs about the size of golfballs and place on an ungreased baking sheet.
Bake the meatballs for 15 minutes on one side and then, turn the meatballs over and bake the meatballs for another 15 minutes on the opposite side.  Set the meatballs aside.

Ingredients for the baked penne:
1 package (12 oz) of favorite gluten free pasta (I prefer Schar's)
1 jar of your favorite marinara sauce ( I am still working on my homemade recipe but it is not perfected, yet)
1 cup parmesan cheese
1 cup mozzarella cheese

Keep the oven at the 400 degree temperature. Cook the pasta for minute less than the  recommended cooking time.  Drain, and set aside.  Over low heat, reduce the marinara sauce until it just starts bubbling.  Set 1/2 cup of the marinara sauce aside; add the meatballs to remaining sauce and keep warm.

Spread the 1/2 cup of sauce on the bottom of a 9 x 13 pan.  Spread the pasta on top of the marinara sauce and place half of the cheese on top of the pasta.  Spread the meatballs and remaining marinara sauce on top of the cheese and pasta.  Sprinkle the remaining cheese on top.
Cover with the dish with aluminum foil and bake for 20-30 minutes.  Remove the foil and bake for another 10 minutes, until the cheese is just starting to brown.  Remove from the oven and let stand for about 10 minutes.  Then, cut the penne in to squares and serve with your favorite veggies!
I am definitely going add this Allergy Free Wednesday and Gluten Free Friday!  Any favorite comfort foods?  Share in the comments section!

Saturday, December 22, 2012

Gluten-Free Chocolate Crinkles

My favorite childhood Christmas cookies were my mom's gluten-free chocolate crinkles.  She always baked them to absolute perfection: done enough to stay together but not overdone to take away from the softness.   They also always turned out so beautifully with the powdered sugar finishing on the top.

When I first tried to make these gluten-free, I followed the Betty Crocker recipe using Gluten Free Bisquick as the substitute for flour, salt, and baking soda.  They turned out well but not quite the same as I remembered; they were a little on the dry side.  I decided to work with my mom's original recipe and my own gluten-free flour blend to see if I could get results like my mom's.  After much trial and error over a couple of Christmases, I finally got the results I was looking for!  The ingredients I used were:

  • 1 3/4 cups gluten free flour blend
  • 1/4 almond flour
  • 1 teaspoon xantham gum
  • 5 ounces unsweetened, baking chocolate (You can get away with 4 ounces but I always add 5 because there is always some that sticks to the bowl)
  • 2/3 vegetable oil (coconut oil works, too)
  • 2 cups granulated sugar
  • 4 eggs
  • 2 tablespoons vanilla
  • 1 teaspoon baking soda
  • 1/2 teaspoons salt
  • 1/2 cup powdered sugar
Fill a medium saucepan with water and place on medium heat.  Place the bowl with the chocolate over the saucepan so the top is covered but the bottom of the bowl is not touching the water.  Stir the chocolate over the boiling water until it is completely melted.  Remove the chocolate from the heat and set aside to cool.  

Whisk together the flour, xantham gum, salt, and baking powder and set aside. In a large bowl or stand-mixer bowl, combine the oil, chocolate, and vanilla.  Add in the eggs one at a time.  Stir in the flour mixture slowly until completely combined.  Cover the dough an refrigerate overnight.

After dough is properly chilled,  preheat oven to 350 degrees.  Grease cookie sheet with gluten-free cooking spray.  Drop tablespoon scoops of dough in to the powdered sugar and roll in balls.  Place about two inches apart on the cookie sheet.

Bake the cookies for 9-11 minutes, or until you can touch them without leaving a fingerprint.  Remove immediately from the baking sheet and cool on a wire rack.  


Tuesday, December 18, 2012

The Perfect Gluten-Free Chocolate Chip Cookies


Christmas is synonymous with home-baked treats.  It seems at this time of the year, everyone is baking their favorite treats from sugar cookies, to gingerbread men, and even the dreaded fruitcake. But nothing is more comforting than a batch of homemade chocolate chip cookies.  My husband absolutely loves chocolate chip cookies and loves it when I bake them for him.  It became my mission to make chocolate chip cookies that are gluten free that will also pass his taste test. And I think I finally cracked the recipe that our whole family can enjoy.

The secret is in the brown sugar and vanilla.  Chocolate chip cookies are at their best when they are soft and gooey and my fellow gluten-freers know that gluten free flours tend to be on the dry side.  Adding extra brown sugar and vanilla keeps the cookies moist and soft.  To start this recipe, you will need:

2 1/4 of gluten-free flour mix
1 teaspoon of xantham gum
1 teaspoon salt
1 teaspoon baking soda
1 cup (2 sticks) salted butter, softened
1 1/4 cups brown sugar
1/4 cup granulated sugar
2 large eggs
1 1/2 tablespoons gluten-free vanilla
1 package of semi-sweet gluten free chocolate chips

In a large bowl, whisk together flour mix, xantham gum, salt, and baking soda.  Then, set aside.  In a separate bowl with an electric or stand mixer, mix together sugars until well-combined.  Then beat in softened butter at a medium speed, making sugar that and butter are completely combined but not over-miexed.  Then, one at a time, stir in the eggs while the mixer is going.  Once they are completely combined, add in the vanilla.  Once all of the wet ingredients are combined, start adding in the dry mix a little at a time, scraping down the side of the bowl as you go.  Then, stir in the chocolate chips.  Cover and refrigerate the batter for at least one hour.  This prevents the cookies from spreading and not cooking thoroughly in the middle, which can be a problem for gluten-free cookies.

Once the batter is sufficiently cooled, preheat the oven to 375 degrees.  Drop rolled, tablespoon amounts of dough on to an baking sheet.  Bake for 9-10 minutes or, until golden-browned.  Remove from the oven and let cookies sit on the baking sheet for about a minute to set.  Then, transfer them to a wire rack to cool.  Then, enjoy with a cold glass of milk! I think these need to be added to Allergy-Free Wednesday...

Do you have any classic, comfort  recipes you've made gluten-free?  Share in the comments section!

Thursday, December 13, 2012

Gluten Free Chocolate Mint Cookies


One of my favorite treats is chocolate and mint, especially at Christmas.  My mom make the best chocolate cookies with mint chips that I so looked forward to every Christmas.  When I was diagnosed with Celiac Disease, it was also one of the first cookies that she learned to make gluten-free for me.  And, they're every bit as good as the gluten-filled version.  

I recently worked on perfecting my own version of these cookies.  You will need:
  • 2 cups of gluten-free flour mix
  • 2 teaspoons xantham gum
  • 1/2 cup unsweetened cocoa powder
  • 1 cup of salted butter (room temperature)
  • 1 1/4 cups brown sugar
  • 1/4 cup sugar
  • 2 eggs
  • 1 teaspoon baking soda
  • 1/2 teaspoon salt
  • 1 bag of gluten-free mint chips
Preheat the oven to 375 degrees.  Lightly grease two baking sheets or line with parchment paper.  In large bowl, whisk together flour mix, xantham gum, cocoa powder, baking soda, and salt.  

Using an electric or standing mixer, cream together the butter and the sugars.  While the mixer is still going, mix in eggs, one at a time, and the vanilla.  Slowly mix in the flour mixture until it is completely combined, scraping down the sides of the bowl.  Stir in the mint chips and refrigerate the dough for 30 minutes


Drop tablespoons full of the cookie dough on the greased baking sheets about 2 inches apart.  Bake for 10-12 minutes. Let the stand for 1-2 minutes before removing from the baking sheet to cool.


Tuesday, December 11, 2012

12 Days of Gluten Free Baking: Gluten-Free Flour Mix

Happy Holidays!  It has been a long time since my last post.  Our home remodeling project hit epic levels after my last post.  We were living with our down to the studs and absolutely no kitchen.  I really couldn't take washing dishes in the bathroom sink so my cooking, and blogging, came to a halt.  But now I am armed with a new, almost done kitchen (I'll post pictures soon!)  and I am ready to start sharing my favorite gluten-free recipes again!

I absolutely love the holiday season.  I am one of those people who starts celebrating Christmas in October, goes to every possible holiday event, and needs a week to watch all of my favorite Christmas movies.  One of my favorite parts of the holidays is baking special treats.  My mom is an incredible baker.  I have the best memories of baking chocolate crinkles, spritz cookies, and caramel-cashew bars with her and having those be everyone's favorite treats!  The idea of not being able to continue on with those wonderful recipes because I have Celiac Disease.  So, this year, I am determined to make these treats gluten-free and have them be the same crowd-pleasers they always were.

Before I could start any holiday baking, I knew I needed to perfect my gluten-free flour mix.  I turned my new kitchen in to a science lab with me trying to find the perfect proportions of sorghum flour to tapioca starch.  After much trial and error and a very supportive husband as my taste tester,  I think I have come up with a perfect g-free flour mix.  I have tried this mix for cookies, pie crusts, cakes, brownies, and quick breads and each time they have withstood the husband taste test.  This is the mix I use:

  • 3 cups brown rice flour
  • 2 3/4 cups sweet rice flour
  • 1 1/2 cups sorghum flour
  • 1/2 cup tapioca starch
  • 1/2 cup potato starch (corn starch works in place of the potato starch with similar results)
  • Yields: about 8 1/2 cups
After whisking all of the flours together in a large bowl, I put the mix through a sifter and store in an airtight container. 

 Most gluten-free baking recipes will call for xantham gum or guar gum.  I like to add that as I am baking because I think it works better if it is refrigerated.

Thanks to the Gluten Free Goddess, Gluten Free Mommy, and Ellen's Kitchen for the great tips on gluten-free flours.

Do you have any favorite gluten-free flour blends?  Share them in the comments section!

Friday, August 31, 2012

Gluten-Free Brown Butter Mizithra Pasta

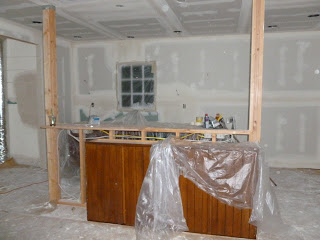
This week we finally finished our drywall!  It feels so good to actually have walls and a place to prepare food.  We are getting pretty sick of eating out.  And, by the end of next week, we should have our kitchen cabinets up and ready to go.  But that means we are having a massive "paint party" this weekend. And that also means that my remnants of a kitchen were moved outside.

Since it's such a nice night out, I decided to take advantage of my new "outdoor kitchen" and do a little cooking.  With limited prep space, I wanted to make something simple.  During my first week back at school, my friend Lynn and I talked about how much we love Spaghetti Factory Brown Butter Mizithra Pasta.  She also told me that it was super-easy to make.  All you need is:

  • 1 box of your favorite gluten-free pasta, cooked
  • 1 cup (2 sticks) unsalted butter (make sure it is gluten-free)
  • 3/4 cups mizithra cheese
After you cook the pasta, place the butter in a saucepan over medium heat.  Melt the butter until it starts boiling.

Once it starts boiling and frothing, you need to stir it continuously for about 5 minutes until it stops frothing.  Make sure not to let it boil over because if the butter catches the heat, it will catch on fire.


Once the butter stops foaming, it will start to turn a light brown color.  Cook for another 1-2 minutes until the butter starts to smell like carmel.  Then, remove it from the heat and pour it through a strainer on to the pasta.  Mix it well. Then, add the mizithra cheese and serve.  
This is super-rich and tasty meal.  I think I will share it on Allergy Free Wednesday and Gluten Free Friday....

Sunday, August 26, 2012

Favorite Gluten-Free Breakfast Spots

This has been a very exciting weekend for us:  we finally have walls!  The drywall has finally gone up in our kitchen and dining room.  It is such an exciting process for us because we can now get a real vision of what our house will look like when the remodel is done.  


While I am so excited to see the drywall go up, I have lost any ability to cook or do any sort of food preparation.  Our sink looks like a crime scene so we can't even do dishes after cereal or something simple.  Not that I am complaining. ;-) So my wonderful husband took me out to a lot of meals this weekend.  One thing that we did that we don't usually do is go out to breakfast.  I absolutely love going out for breakfast on the weekends!  But, as people with gluten intolerance know, going out to breakfast gluten-free can be tough.  Most breakfast foods have some sort of gluten in them and, even if they are made gluten-free, you still have to worry about cross-contamination when eating out. Luckily, Portland has a lot of wonderful gluten-free breakfast restaurants that are knowledgeable about cross-contamination.  Here are a few of my favorites:

1.  Bob's Red Mill:  This is a combination grocery store and restaurant.  As many of you probably know, Bob's Red Mill makes a lot of gluten-free flours and products and they put those products to use in their restaurant.  They have a gluten-free menu where you can get biscuits and pancakes made in a separate pan.  They also have a case of gluten-free and vegan pastries that are amazing.

2.  Slappy Cakes: This restaurant it so much fun I can hardly stand it!  They have gluten-free batter to which you can add any toppings and fillings like bacon, cheese, sausage, chocolate, berries, peanut butter, and more that I can't remember. Then, they bring the batter to your table and you grill the pancakes right at your table! You can also order delicious organic eggs, omelets, breakfast meats, and healthier fare.  My favorite thing about this restaurant is the care they put in to preventing cross-contamination.  They steam clean each table after use and they will make your pancakes in the kitchen in a gluten-free safe pan if you don't want to make yours at your table.  When you go, try one of their speciality cocktails, they are to die for!

3.  Singer Hill Cafe:  This place is actually in Oregon City but I had to mention it because they have amazing pastries and gluten-free wraps.  I went there with my in-laws once and had the most incredible egg, cheese, and bacon wrap and smoothie.  Their brownies are amazing, too. :-)

Any favorite gluten-free breakfasts?  Share in them in the comments section!

Thursday, August 23, 2012

Gluten-Free Maple Nut Waffles

Happy National Waffle Day!  Well, actually it is tomorrow.  I had no idea something like this even existed but, as a huge waffle lover, I am all ready to celebrate.  Today, in an effort to use up as much of our food as possible before the drywall instillation, I decided to try making a new type of waffle I have not tried before.  I am calling them gluten free maple nut waffles.  They actually turned out really well and I think they would have turned out better had I dug out my mixer from the basement instead of mixing by hand.

I started off by playing around with my usual gluten free waffle flour mix. I usually opt for a crispier waffle and only use gluten free starch and brown rice flour in my waffles, but I thought I would need a denser waffle to hold the nuts and the oats.  And with the addition of the oats, they still has a little bit of the crispiness I like in waffle.  :)  To make this recipe, you need:

  • 1/2 cup sorghum flour
  • 1/2 cup tapioca starch
  • 1/2 cup almond flour
  • 2 tablespoons gluten free baking powder
  • 1/2 teaspoons salt
  • 1 3/4 cups milk (cow, almond, soy should all be fine)
  • 2 eggs
  • 1/4 cup melted butter
  • 2 tablespoons maple syrup
  • 1 cup gluten free rolled oats
  • 1 cup pecans, finely chopped
Start by sifting together the flours and starch.  Then, use a whisk to add the baking powder and the salt and whisk until everything is well-combined. Use a mixer or stir vigorously by hand while adding the milk, butter, eggs, and maple syrup.  While still mixing, add in the oats and the nuts until they are well-mixed in the batter.
 Let the batter sit for a couple of minutes to thicken while you preheat the waffle iron to medium heat.  Then, add 1/2 cup of batter to the waffle iron and cook for about 5 minutes.  If your waffle iron is not non-stick, you'll want to grease the iron before adding the batter.  When they are done, remove from the waffle iron.  They taste great with jam, whipped cream, or maple syrup and butter.
Any recipes to celebrate national waffle day?  Share in the comments section!

Wednesday, August 22, 2012

Gluten Free Walnut Pesto Pasta

As the summer ends and the school year creeps upon me I am coming to terms that I am going to have less time for cooking and need more time for grading papers.  Especially with the kitchen torn apart and  some serious construction coming our way.  Drywall, anyone?:)  Today as I was working on my calendar for the upcoming year, I kept thinking about what I was going to make for dinner on little time and almost no space.  I try to make dinner with a healthy amount of protein in it as I have been running a lot and my husband comes home from work and immediately puts sweat equity in to our house.  Since I had no time nor space to make meat tonight, I tried to think of an alternative.  Since I had a large jar of pesto in my fridge that I needed to use, I thought it might be fun to see if toasted walnuts tasted good with the pesto and pasta.

Walnuts have a lot health benefits.  Research has shown that eating just a few walnuts per day can lower your levels LDL (Bad) cholesterol and improve the blood flow for people with Type 2 Diabetes. They are also a good source of fiber, vitamins B and E, and they act as a natural anti-inflammatory, which really benefits people with autoimmune diseases.

The recipe I made tonight is super-easy to make and really tasty.  All you need is:

  • 1 box of your favorite gluten-free pasta
  • 1/4 lb walnuts 
  • 3 tablespoons Summer Pesto (click link for recipe)
  • Salt to taste
  • Parmesan to taste (optional)
Toasting walnuts is really easy.  Heat up a dry pan over medium heat.  Once the pan is hot, add the walnuts.  Toast for about 3-5 minutes or until you start to smell the toasted taste.  Remove them from the heat.  Cook your pasta as instructed and then add the pesto and walnuts, stirring until the walnuts and pasta are covered.  Top with parmesan and enjoy!
As you can tell, we love parmesan!
Any quick, gluten-free meals?  Share in the comments section!

Tuesday, August 21, 2012

Gluten Free Peanut Sauce with Chicken and Broccoli

After last night's barbecue fiasco, I felt the need to redeem myself, i.e not burning dinner.  So, I set out to make a dish with one of our favorite things: peanut sauce.  We have been eating fresh rolls and gluten free peanut sauce from Chaba Thai in NE Portland at least twice per week.  I thought I could make the peanut sauce healthier (and cheaper) at home.  I found a great recipe on the blog Cooking with Amy and I just made some revisions to make it gluten free and fit to our taste. To make this recipe, you will need:

  • 1/2 cup creamy peanut butter
  • 6 tablespoons gluten free soy sauce
  • 1/2 cup coconut milk
  • 1 small lime, squeezed
  • 3 tablespoons brown sugar
  • 1 teaspoon chile sauce
  • 1 teaspoon ginger
  • 1 teaspoon crushed red pepper flakes
  • 1/2 cup water
  • 2 lbs chicken breasts, sliced in to thin strips
  • 1 head of broccoli, chopped
  • 2 tablespoons olive oil
  • White or brown rice, cooked
Start by marinating the chicken in 4 tablespoons of the soy sauce.  You can also marinate the chicken in curry and it goes well with the peanut sauce; I just don't tolerate curry well.  Cover the chicken and refrigerate for at least one hour.  Then, start making the peanut sauce.  In a medium sized saucepan, whisk together the peanut butter, remaining soy sauce, coconut milk, lime juice, brown sugar, chile sauce, ginger, and red pepper flakes.  Then, add the water and mix until you have a liquid substance.  Transfer the saucepan to a burner set at medium-heat.  Heat the sauce until it is think and bubbling, stirring occasionally, then set aside:


Pour 1 tablespoon of olive oil to a frying pan over medium heat.  Add the chicken to the oiled pan and cook until all of the pink is almost gone.  When the chicken is almost done, add another tablespoon of olive oil to the pan and then add the broccoli.  Cook for another 2-3 minutes until the chicken and broccoli are completely done.  Then add the peanut sauce.  Stir until all of the chicken a broccoli are covered and remove from the heat.

Serve over rice soon after it is finished.  This dish also makes for great leftovers!:
I think this recipe will go on Allergy Free Wednesday and Gluten Free Fridays!  Any family favorite recipes?  Share in the comments section!

Monday, August 20, 2012

Gluten Free Barbecued Pizza

We are heading in to our 5th month without a working kitchen.  I shouldn't complain as we at least have a fridge, sink, and a little counter space.  But, as we grow weary of takeout and I run out of creative ideas for the crock pot and camp stove, times are getting desperate.  Well, desperate may be a strong word, but we are running out of ideas.  Tonight I decided to try my hand at the barbeque.  My husband is usually the "grill master"  but I thought it would be fun to try gluten free barbecued pizza. I have heard of people doing it and we were excited to try something new.

Now, I will preface this recipe with the fact that I usually make my own gluten free pizza crust.  In fact,  I make quite delicious gluten free pizza crust and I will eventually share the recipe.  But there was no way that I could make it myself tonight as we only have about two square feet of counter space left and most of my baking utensils in the basement.  So, I did the unthinkable and bought pre-made gluten free pizza crusts.  I say the it is the "unthinkable" because pre-made, gluten free pizza crusts are really hard to manage.  They are fragile and tend to crumble easily.  If I had to do this recipe again, I would make my own dough.  For the rest of the pizza you need:

  • About two tablespoons of olive oil
  • Your favorite sauce (marinara, olive oil, pesto, or whatever you like on your pizza)
  • Your favorite blend of Italian cheeses (mozzarella, parmesan, ricotta, etc.)
  • Your favorite gluten free pizza toppings, anything goes!
Get all of your ingredients together before you heat your grill.  Take the olive oil and lightly brush all sides of the crusts with the olive oil. This prevents it from sticking to the grill:
(Do you like how we are using our siding as a prep station?)

Contrary to what I did, you should heat your grill to a medium-low heat.  The crusts will burn quickly if the coals get too hot.  Once the grill is heated, cook your crusts for about 2 minutes without adding the toppings.  Once the crusts have firmed up enough to where they are not crumbly, add your sauce, cheese and toppings.
(I over-handled the crusts and they broke :()
Cook for about another 2-5 minutes until your toppings are cooked.  If you are using uncooked meat, you will want to cook it before adding it to the pizza.  The same is true for veggies, although that can be considered a matter of taste.  

Pros of barbecuing pizza:  It really bring out the flavor of all the ingredients and you get a nice, wood-fired taste to the crust.

Cons: You know the saying, "the sauce is the boss"?  When you barbeque a pizza, the crust is the boss.  So you need to get it perfect to truly appreciate the barbecued taste of the pizza.  And, in this case, pre-bake crust just wasn't doing it for me.

Any new, gluten-free barbecue ideas?  Share them in the comments section!

Sunday, August 19, 2012

Gluten Free Pumpkin Oatmeal Pancakes

I am down to my final week of summer vacation, sigh.  This week will be a week of lesson planning, house cleaning, laundry, and waking up earlier.  Even though I do love having the time off during the summer, there are a lot of things that I look forward to in the fall.  I can't wait for college football (go Ducks!), the holidays (yes, I start celebrating Christmas November 1st), Starbucks' Pumpkin Spice Latte, and, actually, anything with pumpkin.  Today, to kick of my countdown to going back to school, I decided to make pumpkin pancakes for breakfast to remind me of all of the things I love about fall.  Also, I don't have an oven yet to make pumpkin bread.  :)

Pumpkin is actually pretty healthy as it has a lot of fiber and it is filling.  It is also easy to incorporate in to a lot of recipes. Today, I actually used my Gluten Free Oatmeal Pancakes as a base for making pumpkin pancakes.  To start, all you need:

  • 1/2 cup certified gluten-free oats
  • 1/2 cup pumpkin (not pumpkin pie mix)
  • 2 eggs
  • 1/4 cup milk
  • 1 teaspoon baking powder
  • 1 tablespoon vanilla
  • 1 teaspoon cinnamon
  • 1 teaspoon nutmeg
  • 1/4 cup pecans (optional)
Mix all of the ingredients together in a medium sized bowl until there are no lumps of pumpkin.  Take 1/4 cup scoops of the batter and place in a well-greased pan over low-heat.  Cook for about 5 minutes and then flip over and cook for 5 minutes on the other side.  You can eat these with whipped cream and more pecans, apple butter, or traditional maple syrup and butter.

Any favorite fall recipes?  Share them in the comments section!

Friday, August 17, 2012

Running a Half-Marathon and Garage "Saleing"

I've been a little bummed because I don't think I'll be able to run the Eugene Women's Half-Marathon this year.  We have too much going on with the house this week and I need to get ready to go back to work.  But, on a garage "saleing" (we turn everything in to verbs) with my friends Lynn and Amy, Lynn's lovely niece Shelby told me about a half-marathon she is running in October called the Girlfriends Half Marathon. It sounds a lot like the Eugene Women's Half-Marathon, girl-power, massages, and chocolates, but it is closer to home.  I'm going to sign-up to keep myself accountable and I am feeling super-stoked to get back to distance races!

Shelby was asking Amy and me for advice on running in a half-marathon as it is her first.  As we started to give her our old, stand-by tips, we started noticing similarities in running a half-marathon and garage "saleing".  While it may seem like a stretch, the advice you would give someone on running a half-marathon has a striking similarity to the advice you would give someone when they first go garage "saleing".  If you will indulge my zen-buddha-yoda moment, read these tips and see if you agree.

  1. Eat a good, easy to digest breakfast, but don't try anything new:  When you are running in a distance race, you need to give your body good fuel to make it all of those miles.  While l like to eat gluten-free pancakes, as you may have noticed, Amy likes to eat a bagel with peanut butter.  Either one is a matter of taste, but they are both easy to digest and won't weigh you down.  It is also important to eat something that you know agrees with your body.  You don't want to get creative race-day morning with something you have never tried before based on advice someone gave you.  You risk not tolerating the food and ending up with stomach pains half-way through the race. (Been there.)   If you are a seasoned "garage saler", that is also good advice to give a novice "garage saler."  Think about it: garage "saleing" can be something of an endurance sport. You have to get up early, look at your route, and try to make good time so you can hit every garage sale.  Most likely, you will travel in a pack of people and no one is going to want to be around you if you are getting "hangry."  You need a solid breakfast before you head out so you are sustained to make it to as many sales as possible.  You also want to make sure you are eating something that agrees with you because when you once you are out "saleing", it will be very difficult to find a bathroom stop.
  2. Bring a cell-phone or a way to get ahold of someone in an emergency: If you are running your first long-distance race, it is a good idea to bring your cell phone with you in case something happens.  You may not know the course well and you may incur an injury away from an aid station.  It's a good idea to have someone on standby that can get you help just in case this happens.  The same can be said for garage "saleing".  You may encounter unfamiliar territory on your route and you need to have someone to call in case you need directions.  You also might get a flat, run out of gas, or see scaffolding that your dad needs and need to get ahold of him immediately so he can purchase it.  Right, Lynn?  :)
  3. Hydration is key: Drinking a lot of water up to and during your half-marathon is essential to making it through well.  My dad, who is an awesome distance runner, always tells me to get water, sports drinks, or gel at every stand that I come across, even if I don't think I immediately need it.  There is nothing worse than feeling dehydrated during a race; that is why there are usually a lot of water stands.  Hydration is also key to having a successful garage sale outing.  If you are not drinking enough fluids, you will not effectively negotiate or make it to the afternoon sales. Make sure that everyone in the car has a bottle of water with them at all times.
  4. Pace yourself:  When you are running your first half-marathon, you'll probably have the urge to jump right out of the gate and start with a fast pace.  That is normal given the crowds and the excitement of the starting line.  But remember that you have a lot of miles to run and you need to save energy for the end of the race.  With your first race, remember the goal is to just finish and enjoy the race, not set a world-record.  Again, I would advise a first time "garage saler" in the same way.  Don't buy everything you see at the first couple of sales.  Pace  yourself, watch what people around you are buying to make sure you are getting a good deal, stop and think if you really need what you are buying, and learn negotiating tips from the seasoned "garage saler."  
  5. Protect against chaffing: This tip can save your race: make sure to wear Vaseline, Body Glide or something similar in your "sensitive areas".  Jogging bra or running shorts chaffing is not fun during a race so make sure you protect yourself beforehand.  While this might seem like an odd tip for garage "saleing", you might want to consider bringing something to protect against chaffing on this outing as well.  Because the driver of the car you are in might get overly excited about seeing a sign for a sale and drive over a CURB to turn around to find it.  And in the process of driving over said curb, you might get flung in to the DOOR causing a major BURN on your arm.  And then you will wish you would have protected yourself.  Not that this happened to me before. ;)
  6. Bring your best crew:  It's so important to have a good crew cheering you on to the finish line when you run your first race.  I would totally recommend running with a friend or having a group of friends and family willing you to the finish line.  That makes the race that much sweeter.  It is also true of garage "saleing".  You'll have so much more fun if you have a group of friends to go to lunch with when you are done, talk about your finds, gossip about weird houses, and laugh about your burn marks. :)
Any good half-marathon or garage sale tips?  Leave them in the comments section!

Thursday, August 16, 2012

No-Bake Gluten-Free Nutrition Bars

Yesterday was my second boot camp class with Antje Fimmel  from BeneFitnessPDX.  I was definitely feeling it today but I am starting to feel stronger.  Today, I am trying to keep their mantra, "Eat Clean, Train Dirty", in mind as I plan my meals for today.  I was not, however, remembering that mantra as I scarfed down JellyBellys at the movies last night. :(  But today is a new day and I thought it would be fun to experiment with making my own post-run nutrition bar.  After doing some research, I found a really easy way on food.com to make a nutrition bar at home with natural, healthy ingredients.  I just modifications to make them gluten-free and for my own taste.  And they turned out quite delicious; better than the store-bought brands if I do say so myself. :)  All you need is:

  • 3/4 cup natural almond butter 
  • 1/2 cup honey (maple syrup works, too)
  • 1 1/2 cup certified gluten-free oats
  • 1/2 cup dried cranberries
  • 1/4 cup cashew pieces
  • 1/4 cup chocolate chips (optional)
Heat the honey and almond butter over low heat until they are just combined and easy to stir.  You don't want to "cook" them or have the mixture start to boil.  You just want to get it warm enough to mix with other ingredients.  Then, stir in the oats 1/2 cup at a time until a dough-like texture is created.  

Add in your dried cranberries, cashews, and chocolate chips.  You can really use any dried fruit or nut combination you like; these are just my favorites.  And you don't have to add the chocolate chips as they are not exactly "eating clean."  But sometimes I just can't help myself!  You can also add whey protein powder to them if you want them to be a "protein bar".  The almond butter and the cashews were enough for me. Spread the mixture in to an 8x8 greased pan.  Make sure the dough gets really pressed in to the pan so it is flat and feels like a solid surface.
Refrigerate for about 3 hours until they are firm.  Then you can cut them in to any shape you like!  I recommend putting plastic wrap around each bar as they will stick together if they are stacked on each other.  They really are a post-workout great snack .  I had one after a run today and it did the trick!

I think I will add these to Allergy Free Wednesday! Anyone else have any snacks to fuel-up before or after a workout?  Share in the comments section!

Wednesday, August 15, 2012

Crock-Pot Flank Steak

The temperature is quickly rising as we brace for 100 degree temperatures. I shouldn't be complaining considering what the rest of the country is going through. But I am worried that the first month of teaching will be scorching, which is no good for anyone involved. Today, in an effort to keep the house cool, I decided to give our little camp stove a break and go back to what I know best: the crock pot.  We had a bad experience grilling a flank steak a couple of weeks ago (wrong seasoning and the butcher over-tenderized).  So, on advice from my mom, I decided to try it in the crock pot.  I decided to try it "carne asada style" as I have been having good luck with Mexican food lately.  And we also have about 12 bags of chips in the house right now needing an excuse to be eaten.

We bought a .75 lb flank steak yesterday, but it would probably have been easier to make with a 1-1.5 lb steak as we had a lot of left over sauce and seasoning.  To make the seasoning for the steak, you need:

  • 1 tablespoon  chile powder
  • 1 tablespoon cumin
  • 1 teaspoon sea salt
  • 1 teaspoon ground black pepper
  • 1 teaspoon crushed red pepper flakes (optional)
  • 1 jar of your favorite salsa (chopped tomatoes and onions work too if you add water or beef broth to the pot)
  • Juice from 1 lime
  • 3 garlic cloves minced
In a bowl, whisk together the chile powder, cumin, sea salt, black pepper, and red pepper flakes.  Make sure all of the ingredients are mixed well so you don't have overwhelming flavors of one.

Coat each side of the steak thoroughly with the seasoning mix and then place the steak in the crock pot:
Add in the salsa, lime, and garlic to the crock pot.  You may want to add a little bit of water to prevent burning.  Cook the steak on low and check after 6 hours.  It may take up to 8 to cook, depending on your crock pot, but mine was done in about 6.5.  This steak recipe works great for tacos, nachos, and even as a salad topping, which is how we ate it tonight.

This may be one I add to Allergy Free Wednesday...

Any favorite hot weather recipes?  Add them in the comments section!

Tuesday, August 14, 2012

Going Back to School Gluten Free

I hate to admit it but it's getting to be that time of the year: it's time to get ready to go back to school.  And with back to school time comes a lot of planning.  For me, that means lesson planning, seating charts, first day if school activities, and planning some sort of organization scheme for my classroom.  I'm sure, for parents, back to school means planning on how to get your kids up in the morning, finding out their teacher, and getting all of the school supplies they need to start the year.  And for parents of kids with celiac disease or gluten intolerance, it means planning on how to keep your students healthy while out school.

I can't imagine being a kid trying to avoid gluten during the school day.  As a teacher, it's hard enough to keep myself from eating gluten and cross-contamination and I'm an adult who packs their own lunch.  With class birthday parties, cafeteria food, candy during holidays, and kids sharing lunches, it must get really stressful making sure your child is gluten-free during the school day.  But after working in schools for more years than I care to mention, I have learned a few tricks for staying gluten-free during the school day:

  1. Make sure the office knows: Most schools will have parents fill out some sort of registration and health update when children go back to school.  It is really important to include on this information that your child has an intolerance to gluten.  This may seem obvious but I have noticed that some parents forget to put food allergies on those forms.  When you fill out those forms, all of your child's teachers will have access to that information and will be alerted to the allergy.
  2. Still, talk to the teacher: Even if the office knows, it is important to talk personally to your student's teacher about their food limitations. Let the teacher know that they simply can not have any contact to gluten as it will be damaging to their health.  Many teachers like to give their students treats from time to time, so instead of listing all of the foods your child can not have, I would bring a bag with your child's name on it filled with celiac-friendly treats.  That way the teacher will not have to memorize the daunting list of food with gluten and you'll have peace of mind knowing that your child's health is being taken care of.  I would also ask the teacher to mail a list of days where there may be class parties (birthdays, holidays, etc.) Teachers, especially elementary teachers, make these anyways and then you can bring in a gluten-free cupcake or cookie for your student on party days so they are not left out of the fun.
  3. But do tell the teacher about school supplies with gluten: You do need to tell the teacher about potential school supplies with gluten in them, like papier mache and Play-Doh.  I believe that there are gluten-free versions of Play-Doh but the teacher needs to know as this is not common knowledge.  Ask if there is something else they can do if these types of projects are in the curriculum for the year; most teachers will accommodate. :)
Any other ways to stay gluten-free at school?  Share in the comments section!

Monday, August 13, 2012

Easy, Gluten-Free Stir Fry

Today, things seemed to be running smoother.  The eye is healing, we are putting in insulation, and we can see drywall in our future.  To make a push towards our next objective, we had another one of our famous "work parties."  I like how you can add "party" to something to try and make it sound fun.  Maybe next I'll have a "toilet-cleaning party" or a "going back to work party."  Anyways, I digress.  To keep the "party crew" energized, we need to provide sustenance.  I have been craving my mom's delicious stir fry from when I was a kid and  stir fry seemed like a nice counterbalance to all of the barbeque and Mexican food we have been eating.  But, with my wok buried in the basement with the majority of my cooking supplies, I needed to get creative and keep it simple to make a stir fry.

I figured I could make it easily enough in a frying pan as long I watched it carefully.  The ingredients I started with were:

  • 1 lb chicken breast, cut in to thin slices
  • 1 head of broccoli, chopped
  • 1 zucchini, sliced in to pieces (you can add most any vegetables that you want as long as they equal about 4 1/2 cups worth)
  • 2-3 tablespoons oil
  • 6 tablespoons gluten-free soy sauce
  • 1 1/2 cup gluten-free chicken broth
  • 3 tablespoons gluten-free corn starch
  • 2 teaspoons gluten-free brown sugar
  • 1 tablespoon crushed red pepper flakes
  • 1/2 cup salted cashews
  • White or brown rice, prepared as instructed
I started by taking the sliced chicken breast and marinating in 3 tablespoons of the gluten-free soy sauce for about 3 hours.  It makes the chicken more flavorful and tender if you marinate it.
Once the chicken is done marinating or your "party crew" is hungry, mix together the rest of the soy sauce, the gluten-free chicken broth, the gluten-free brown sugar, the gluten-free corn starch, and the crushed red pepper flakes until they are well-combined.  You will need to keep stirring the sauce occasionally to keep the soy sauce from settling at the top.

Then, add 1-2 tablespoons of oil to a skillet.  Heat the oil on medium heat and then add the chicken, stirring constantly.  Once the chicken just starts to turn white on the outside, you can add the garlic.
This is where the recipe gets a little trickier.  If I had a wok, I would just push the chicken to the sides and start cooking my vegetables.  But since I don't, I had the options of removing the chicken and cooking the vegetable separately or cooking the vegetables with the chicken and hope not to make a mess.  I chose the latter of the two and it worked out fine. I only made a little mess.  You'll probably want to add another tablespoon of oil to the mix to prevent things from sticking.  Cook your vegetable 3-4 minutes:

Once the vegetables are done, add the cashews and a little bit of the sauce to the mix. Reduce your heat to low.  You don't want to add all of the sauce at once or your vegetables will get soggy.  Keep stirring and adding sauce until all of the sauce is added.  After all of the sauce is added, continue cooking on low for about 2 minutes.  Then, remove the skillet from the heat.  Let it cool for about 3-5 minutes and serve over rice.


That is the gluten-free version of one of my favorite childhood recipes! This may go on Allergy Free Wednesday. Do you have any childhood recipes you've made gluten-free?  Share them in the comments section.

Sunday, August 12, 2012

Gluten-Free Pulled Pork Tacos

Today was one of those days.  It was a both spouses getting colds, no one got any sleep, falling way behind on house projects, someone going to urgent care for a metal sliver in the eye kind of a day.  Not to mention since I was a big baby about getting a cold yesterday, I really needed/wanted to get a long run in today.  So with two cranky spouses, a longer than anticipated visit to the urgent care, and a long run on the agenda, I needed to turn to an old, trusty friend for dinner: my crock pot.

If I haven't emphasized this enough, I love cooking with a crock pot.  There is something so wonderful about coming hope to the wonderful sound of a bubbling pot and the smell of a lovingly prepared dish that can make anyone believe they are a master chef, when, in reality, you just pour some ingredients in a pot and pray.  After I rushed visit to the grocery store and a sale on pork shoulder butts, I felt this day called for some delicious, and gluten free, pulled pork tacos.

We love having pulled pork for dinner but I have never made it for tacos before.  Still I figured that this was a dish that the crock pot and I could handle. I bought a 2 lbs boneless pork shoulder butt at the store (I usually like to get bone-in but they were out).  Before doing any seasoning, I cut the roast in to four parts so I could easily trim the outer layers of fat.  Some people like to cube the roast in to small pieces before cooking it but, pork shoulder shreds so easily, I didn't think that was necessary.  You don't want to try and trim all of the fat off as leaving some fat will make it more flavorful:
(Before I started trimming the fat)

After your pork is trimmed, you are going to need:

  • 4 tablespoons gluten free taco mix
  • 1 table spoon chile powder
  • 1 tablespoon cumin
  • 1 teaspoon crushed red peppers
  • 1 teaspoon cumin
  • 2 limes
  • 1 jar of your favorite salsa (if you make your own, that's even better.  My step-father-in-law makes an awesome salsa that I'll post sometime but I didn't have the energy today)
  • Corn Tortillas
  • Your favorite taco fillings
First, pour about 1/3 of a jar of salsa in the bottom of the crock pot.  Then cover one side of each piece of pork with half of the gluten free taco mix and half of the other spices.  Place the pork in the crock pot and cover the other side with the remaining seasoning and spices.  Once the pork is covered in spices, you need to squeeze in the lime juice.  This step is important as it helps break down the meat and make it more tender:
(Husbands are a really good help for this part!)

Once all the lime juice is on the pork, pour the rest of the salsa on top of the pork.  Pork can take a while to cook so leave 6-8 hours of cooking time on low. 

You'll know the pork is done when it shreds easily with a fork and you see little fat holding it together.  Once it is done, remove the pork from the crock pot and shred it with a fork, removing any large pieces of fat.  You can return the shredded pork to the crock pot to soak up more of the salsa.  This gluten-free pulled pork works great in tacos, nachos, or on salads.  We tried all three tonight!
The joys of comfort food!  What are your favorite gluten-free comfort recipes?  Share them in the comments section!

Saturday, August 11, 2012

Gluten-Free Oatmeal Pancakes

Saturday is quickly becoming known as my "pancake day".  But, after eating chocolate-peanut butter pie this week, I felt the need to make my pancakes healthier. I love having gluten-free oats in some form for breakfast. They are a good source of fiber and energy as well as being heart healthy, which is really important for me to take in to account.  Today, I decided to make gluten-free oatmeal pancakes.  They do not have any flour or refined sugars and you can easily make them dairy-free if that is what you need.  These pancakes are also really simple to make if you need a quick breakfast.  To start, you need:

  • 1/2 cup certified gluten-free oats (I like Bob's Redmill)
  • 1/3 cup of milk (cow, soy, and almond milk all work fine)
  • 1 egg
  • 1 tablespoon honey
  • 1 tablespoon gluten-free vanilla
  • 1 tablespoon gluten-free baking powder
  • 1/2 teaspoon cinnamon
  • 1/4 cup blueberries (Optional)
In a bowl, mix together the oats, baking powder, and cinnamon. Then add the milk, egg, vanilla, and honey and stir until all the ingredients are well combined:

Blueberries taste great in this mix if you have them.  I didn't have any today or I would have added them. Spray your pan with gluten-free cooking spray and turn your burner to low-heat.  Add about 1/2 cup of the batter to your skillet.  

Cook on one side for about 3 minutes and then carefully flip and cook for 3 minutes on the other side.  This recipe makes about 3, good-sized pancakes. The best thing about these is that you can top them with really anything you like.  If you want a higher protein breakfast, they taste great with peanut-butter or almond butter and jam.  You can also eat them like traditional pancakes with maple syrup and butter.


Now, if I can just get the motivation to go on my run....

If you have any quick breakfasts you like, share them in the comments section!