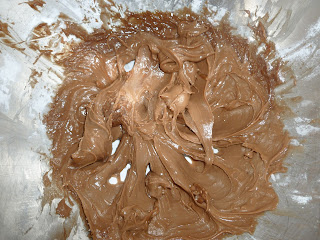
Since today was a "construction break" day, I decided to sneak the mixer out of solitary confinement and have a little fun in the kitchen. Now, being that I only have one day with the mixer, I decided to make my most decadent dessert, No Bake Gluten Free Chocolate Peanut Butter Pie (that's a mouthful). This pie is like buying a Tiffany's Necklace, Chanel Perfume, an Hermes bag, or a Burberry coat; it's an indulgence. But, if you are up for treating yourself, you should give this dessert a try! I am also linking this to the Allergy Free Wednesday blog hub so others can enjoy. To start, you need:
For the Crust:
- 24 gluten-free chocolate-cream sandwich cookies (I like Mi-Del)
- 1/3 cup butter, melted
For the Whipped Cream
- 1 Pint whipping cream
- 2 tablespoons confectioners' sugar
- 2 tablespoons gluten-free vanilla
For the Pie Filling:
- 1/2 cup all-natural creamy peanut butter
- 3/4 cup confectioners' sugar
- 1/2 cup milk
- 1/2 pack of Philadelphia Milk Chocolate Indulgence Cream Cheese (I called the manufacturer; it's gluten-free)
- Half of the whipped cream that you mad
You need to start by making the crust. Take the 24 chocolate sandwich cookies and put them in a food processor or in your mixer. You need to blend the cookies until they are in crumbs and look like this:
After the cookies are blended, mix in the melted butter and combine until all of the cookie crumbs are coated. Once all of the cookies are coated, press them firmly in to the bottom of a pie pan so the entire pan is coated with the cookie crumbs.
You need to refrigerate the crust for at least 1 hour so it firms up and will not crumble when you put in the filling. If you can refrigerate longer or even over night, that would be better. While the crust is chilling, make the whipped cream. Attach the whisk to your mixer (if you can refrigerate the whisk attachment before you make the whipped cream it makes for whipped cream). Pour the pint of whipping cream in to your mixing bowl and mix on high speed until it just starts to stiffen. Right when it starts to stiffen, add the confectioners' sugar and the vanilla. Then, continue mixing until the cream is stiff:
Once you have allowed the whipped cream and the pie crust to refrigerate long enough, start making the pie filling. In your mixing bowl, combine the Philadelphia Milk Chocolate Indulgence Cream Cheese and the confectioners' sugar.
Then mix in the milk and peanut butter and blend until it is completely smooth. Take half of the whipped cream that was previously made and fold it in to the peanut butter-cream cheese mix. When you are done folding, you should have a nice, fluffy pie filling.
Spread the pie evenly filling over the pie crust you made until in comes up to the top of the pie pan.
Cover the pie and freeze for about 2 hours or until the filling is firm. Once it is firm, take the pie out of the freezer and cover with the remaining whipped cream. I also like to add some chocolate chips to the top, as if this pie did not have enough sugar. Once you are done, you can refrigerate or enjoy immediately!


No comments:
Post a Comment